Showing posts with label Mindstorms. Show all posts
Showing posts with label Mindstorms. Show all posts
Monday, June 11, 2012
Video: Lego Cube Solver
Found this really cool video on youtube of a cube solver. This has some pretty advanced programming, but I also liked the interface the user created. I'll try and do a larger write up on it in a few days, but till then- enjoy!


Wednesday, May 16, 2012
Featured Parts: Connecting Pegs
Note: This is the first post in a series meant to help familiarize people with different parts abundant in many mindstorm sets. Send me feedback!
Mindstorms do a pretty good job of giving you total flexibility among design. One thing that sets Lego's apart from other competitive starter robotic kits is a pretty simple part: the connector peg.
While coming in many different variants, the two most common connector pegs are silver and black
Mindstorms do a pretty good job of giving you total flexibility among design. One thing that sets Lego's apart from other competitive starter robotic kits is a pretty simple part: the connector peg.
While coming in many different variants, the two most common connector pegs are silver and black
 |
| Non-friction |
 |
| Friction |
These pegs are the simplest way to connect two beams, creating a degree of motion which is usually essential in most robots, however simple.
Silver, or non-friction pegs do exactly as the name suggests, and spin freely within the slots on the beams they're inserted in. Usually, they are the peg of choice for adding a part that undergoes large amounts of motion (i.e. Wheels, levers, etc.)
Black pegs are sturdier, and when inserted into beams, will lock two beams together, providing limiting the amount of movement possible.
Tuesday, April 24, 2012
Walking With Mindstorms

I explain how the above system works in this video:
Sunday, April 8, 2012
Concept Vehicle: ATV
I've always had an interest in ATV's and there are numerous necessities I've found that are required to build a successful one:
- Power/Torque (any speed is just bonus)
- Flexible chassis (stiff vehicles get stuck and lose traction)
- Good suspension system (goes along with above; as suspension systems enable you to keep traction)
Trying to implement all these into a Lego robot, I came up with this:
.jpg)
I transferred the motors power into the worm gear, which turned the 24t in a gearbox that came standard with my RCX. So though I dealt with a low speed bot, the power that came with it was extremely helpful.
2. A flexible chassis- I put this as a guideline for myself because I felt like without a certain degree of flexibility from your robot, Mindstorm bots can be prone to getting stuck on uneven terrain. Adding a degree of rotation on your chassis helps keep this from occurring.

 The rotation radius of the bot is illustrated in these two pictures of the chassis.
3. A suspension system- A good suspension system is NECESSARY for an ATV. Unfortunately these are a bit tricky to build out of Mindstorm parts. I found an interesting solution using the rubber bands found in many kits, and attached the front two wheels to independently attached mounted suspension beams, supported by said rubber bands. By inverting the system, you have a make-shift suspension.
There are other guidelines into making a successful ATV as well, however these should get you going for now.
Send me pictures of your own ATV's! ashwin.johri@gmail.com
Happy building guys.
- Power/Torque (any speed is just bonus)
- Flexible chassis (stiff vehicles get stuck and lose traction)
- Good suspension system (goes along with above; as suspension systems enable you to keep traction)
Trying to implement all these into a Lego robot, I came up with this:
.jpg)
This is a concept ATV I made out of Mindstorms, I followed the three guidelines I set for myself above, and I'll explain all of them in further detail here in this post.
1. The drive system- Power and torque are essential in an ATV, as the motor must be able to push the robot across any terrain. If you recall an earlier post, I demonstrated how you can get power through gear ratios. I utilized a worm gear meshed with a 24t gear to give me a ridiculous 1:24 gear ratio. That's 24x the power the motor is outputting.
 |
| Example of a worm gear |
 |
| The gearbox |
To achieve this, I simply built the chassis in two separate parts; the drive system, and the suspension mount. This way I was able to lock the two together using two single beams, adding a degree of flexibility.

 The rotation radius of the bot is illustrated in these two pictures of the chassis.
3. A suspension system- A good suspension system is NECESSARY for an ATV. Unfortunately these are a bit tricky to build out of Mindstorm parts. I found an interesting solution using the rubber bands found in many kits, and attached the front two wheels to independently attached mounted suspension beams, supported by said rubber bands. By inverting the system, you have a make-shift suspension.
 |
| Normal drive |
Send me pictures of your own ATV's! ashwin.johri@gmail.com
Happy building guys.
 |
| Suspension flex |
Monday, April 2, 2012
Building a Steering Drive
Steering is an essential component of building a Robot. What fun is a machine that can only go forwards and backwards?
There are a lot of different ways to steer a robot, and one of the most common one is to build a rack and pinion steering drive. The steering drive is used by basically anything with a steering wheel, it's set up so that a gear on the end of the wheel (called a pinion) is meshed with a rack connected to the wheels.
The rack is set up such that there are two degrees of motion, on either side of the set-up, and there's also a non-moving piece to give the wheels something to rotate around. Here's a good (non-lego) diagram of the system:

Now implementing the rack and pinion system into Lego form is tricky, but there are tons of unique solutions out there that I encourage you to take a look at. A quick google search of "Lego Steering Drive" will pull up some really cool results.
In an effort to demonstrate on possible model for a Lego steering drive, I built this:

The steering shaft is controlled by an independent motor, and by playing with the rack sizes, and wheel spacing, you can manipulate the turn radius as well. Building a solid chassis is important for steering drives, as they can quickly become heavy, and excessive moving parts can put stress on a robot. I locked mine with perpendicular blocks you can see laying across the underside, beneath the steering column.
Here's a view on the pinion gear meshed with the rack, it's important to make sure the pinion has enough torque to turn the whole system. Locking gears, and jammed motors are a nightmare to builders.
 Steering drives, while not an easy build for most people, really provide versatility to the bots you make. In the future, we'll explore some more steering systems, like the differential pivot wheel, and reversing motors.
 I'll leave you with a video displaying the turning radius and the piece movement involved with the execution of the drive:
Monday, March 26, 2012
The RCX

The RCX is my preferred base computer for Lego Robots. Lego has a more recent mindstorm computer called the NXT, and though the NXT is probably more user friendly, I don't think it matches the versatility and compatibility of the 2.0 RCX.
Of course choosing your computer is mostly preference, however rcx motors are smaller and it's generally easier to build a chassis around these models compared to the nxt layout. The NXT does hold an advantage in that it's easier to program, however I don't feel like that pro makes the nxt the better computer.
Wednesday, March 21, 2012
Shifting Gears: the Transmission

Deciding your gear ratios is the first step. What kind of power do you want? What vehicle will be using this transmission? Is speed a concern? This transmission used two unique gear ratios:
Gear train #1: 24t:8t:40t:24t (3:1:5:3)
 - This gear train provides torque and power sacrificing speed. The 24t is part of the transmission and when you shift up, the gear train is discontinued while the 24t in the second housing shifts into place, completing...
Gear train #2: 24t:40t:8t:24t (3:5:1:3)
- Here you increase the speed, as you utilize the mammoth 5:1 ratio you're getting in the middle. This transmission is completed when you've shifted up, and using 24t's on the same axle helps complete the train.
The basic design of all transmissions are the same. Utilize two independent gear ratios which you can switch between at the push of a handle/knob. These manual transmissions can have an unlimited amount of speeds depending on how creative you wanna get.

Transmissions are fun to play with, and if you can successfully build one and implement it in your Mindstorm bot, few things can match the performance. Here's a video of the transmission in action, and I look forward to using it in future bots:
Differential Drives

The diagram to the right shows what a basic differential drive looks like. Bevel gears placed in the central gear housing allow the axles to turn independently, enabling the robot to turn in place, and maneuver pretty easily.
The following chart is adapted from "Building Robots with Lego Mindstorms" by the Ferrari Brothers and displays the different behaviors of a robot in accordance to its wheels (powered by the differential drive).

Using different combinations of speed and direction, the robot has the ability to cover any amount of space, and turns at any angle. All this in addition to being very easy to implement.
 I assembled an example of a standard drive, showing how you can use the bevel gears inside the housing to attach the axles, and connecting it to an RCX is as easy as sliding two beams through it.
 As always, I encourage you to send me your designs, and contact me with any questions/comments/concerns. Happy building!
Tuesday, March 20, 2012
Building Robots with Lego Mindstorms
I'm working on a new post for later today or tomorrow, but I wanted to put this out there beforehand.
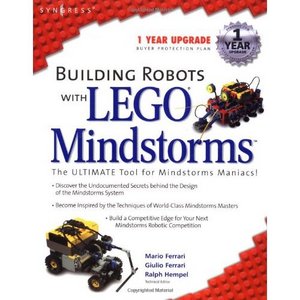 Buy this book. This is a must have for anyone with an inkling of interest in robots or Legos. It goes in-depth on topics I regularly discuss here, and the authors have some of the nicest designs for Mindstorms I've ever seen.
Subscribe to:
Posts (Atom)